Be sure to have installed the SDK or have compiled GMSH using the
ENABLE_LIB options. See the first section of this course for more information.
This section assumes that you are familiar with GMSH inner languages and Python.
(Important) Remarks
- Online documentation is exhaustive
- Numerous detailed examples are given in the source code of GMSH. In particular, you should definitely have a look at
t1.py,t2.py,t3.py, … where the commands are very well detailed and explained. - This tutorial only uses Python but both C++ and Julia work with the SDK!
- Everything you learn prior to this part is still valid (and will actually help you), only the syntax changes (good news!). For example, adding a point (
Point(i)={x,y,z,h}) becomesgmsh.model.geo.addPoint(x,y,z,h,i);.
GMSH CAD Engine
Let start with a circle centered on (0,0) of radius R=1. The code can be the following:
import gmsh
import sys
import math

# Init GMSH
gmsh.initialize(sys.argv)
# Ask GMSH to display information in the terminal
gmsh.option.setNumber("General.Terminal", 1)

# Create a model and name it "MyCircle"
model = gmsh.model
model.add("MyCircle")

# Parameters
R1 = 1  # Radius
h = 0.1 # Mesh size

# Create Point for the center of the circle
center = model.geo.addPoint(0,0,0, h, 10)
# Create 3 Points on the circle
points = []
for j in range(3):
  points.append(model.geo.addPoint(R1*math.cos(2*math.pi*j/3), R1*math.sin(2*math.pi*j/3), 0, h))
# Create 3 circle arc
lines = []
for j in range(3):
  lines.append(model.geo.addCircleArc(points[j],center,points[(j+1)%3]))
# Curveloop and Surface
curveloop = model.geo.addCurveLoop([1,2,3])
disk = model.geo.addPlaneSurface([curveloop])

# Physical groups
# gmsh.model.addPhysicalGroup(dim, list of tags, physical tag)
gmsh.model.addPhysicalGroup(1, lines, 1)
gmsh.model.addPhysicalGroup(2, [disk], 10)

# This command is mandatory and synchronize CAD with GMSH Model. The less you launch it, the better it is for performance purpose
gmsh.model.geo.synchronize()
# Mesh (2D)
model.mesh.generate(2)
# Write on disk
gmsh.write("MyDisk.msh")
# Launch the GUI (not mandatory at all)
gmsh.fltk.run();
# Finalize GMSH
gmsh.finalize()
Launching it via the following command
python mycircle.py
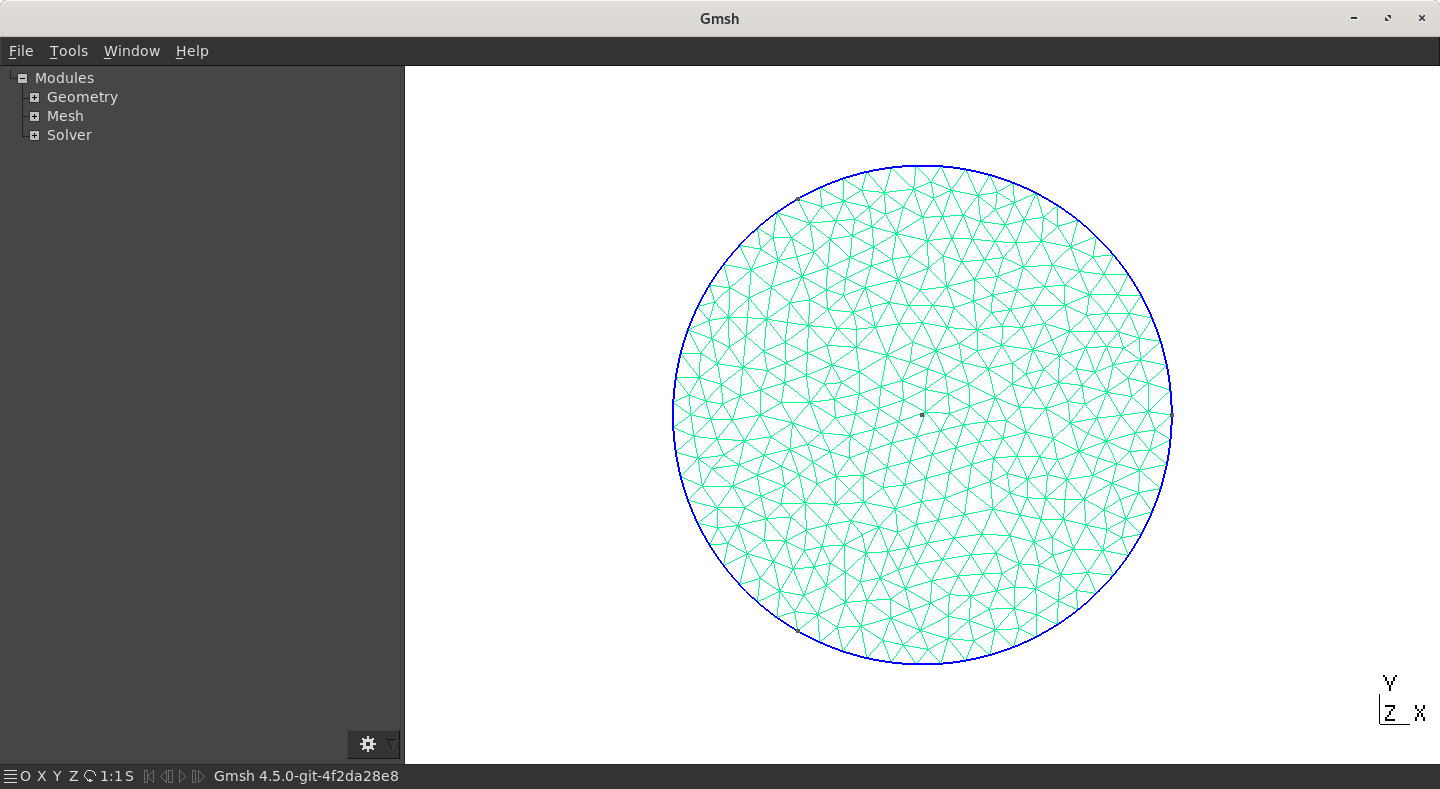
should open a GMSH window with a meshed disk
Using Python API, rebuild the “L-shape” geometry.
OpenCASCADE CAD Engine
Let us redo the CAD example using the Python API. This example can also be downloaded from the source code of GMSH:
# This reimplements gmsh/demos/boolean/boolean.geo in Python.
import gmsh
import sys

model = gmsh.model
factory = model.occ

gmsh.initialize(sys.argv)

gmsh.option.setNumber("General.Terminal", 1)

model.add("boolean")

gmsh.option.setNumber("Mesh.Algorithm", 6);
gmsh.option.setNumber("Mesh.CharacteristicLengthMin", 0.4);
gmsh.option.setNumber("Mesh.CharacteristicLengthMax", 0.4);

R = 1.4; Rs = R*.7; Rt = R*1.25

factory.addBox(-R,-R,-R, 2*R,2*R,2*R, 1)
factory.addSphere(0,0,0,Rt, 2)
factory.intersect([(3, 1)], [(3, 2)], 3)
factory.addCylinder(-2*R,0,0, 4*R,0,0, Rs, 4)
factory.addCylinder(0,-2*R,0, 0,4*R,0, Rs, 5)
factory.addCylinder(0,0,-2*R, 0,0,4*R, Rs, 6)
factory.fuse([(3, 4), (3, 5)], [(3, 6)], 7)
factory.cut([(3, 3)], [(3, 7)], 8)

factory.synchronize();

model.mesh.generate(3)

gmsh.write("boolean.msh")

gmsh.finalize()
Using Python API, rebuild one of the geometry proposed previously.